 Copse & Compass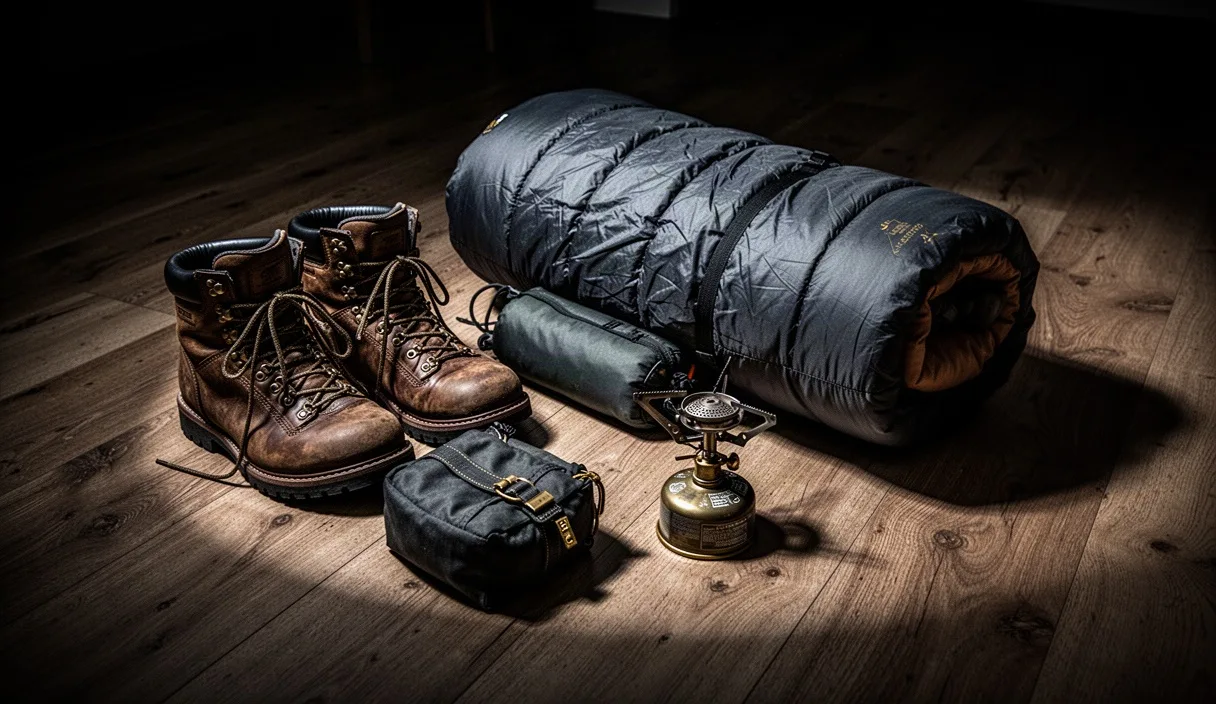

A two-day hike sits in an odd spot between a day trip and a full backcountry expedition. You need more gear than a picnic pack, but you don't need the ten-day food haul or the second stove. Getting the balance right means comfort at camp without a pack that fights you on every uphill. This checklist walks through what we actually carry on our own overnight trips, and why each item earns its place.
We've built this around a standard one-night, two-day loop: hike in on day one, camp, hike out on day two. If your trip involves two nights or a shuttle car, adjust the food and water sections accordingly, but the core gear list below stays mostly the same.
Shelter and sleep system essentials
Your shelter and sleep system usually make up the heaviest single chunk of your pack, so this is where weight decisions matter most. A two-person backpacking tent typically runs 3 to 5 pounds, while a solo tarp-and-bivy setup can drop under 2 pounds. If you're new to overnight hikes, a freestanding tent is more forgiving to pitch than a trekking-pole shelter, especially if you arrive at camp after dark.
For sleep, match your bag's temperature rating to the coldest night you expect, then add a 10-degree buffer. If the forecast low is 45°F, a 35°F bag gives you margin for wind or a damp night. Down bags pack smaller and last longer, but synthetic fill still insulates when wet, which matters if your tent leaks or you get caught in rain during setup.
Don't skip the sleeping pad. It's not just cushioning, it's your insulation from the ground, which pulls heat away from your body faster than air does. Look for an R-value of at least 3 for spring and fall trips; anything below 2 will leave you cold on hard ground even inside a warm bag.
- Tent or shelter: with stakes, guylines, and a footprint if the ground looks rocky
- Sleeping bag or quilt: rated at least 10 degrees below expected low
- Sleeping pad: R-value 3 or higher for cool-weather trips
- Small stuff sack or compression bag: keeps the sleep system from sprawling inside your pack
Kitchen and water gear for two days
For a one-night trip, most hikers need one canister stove, one pot, and a lighter with a backup. A standard 4-ounce isobutane canister will boil water for two to three meals for one person, so it's usually enough for a two-day trip unless you're cooking for a group or melting snow.
Water is where planning saves you carried weight. Instead of hauling two days' worth of water (roughly 4 to 6 liters per person), most trails let you filter from streams or lakes along the way. Check a map or recent trip reports before you go, since some routes have long dry stretches, particularly in late summer.
| Item | Typical weight | Notes |
|---|---|---|
| Canister stove | 3 oz | Pair with a lighter and matches as backup |
| Pot (1 liter) | 5-7 oz | Doubles as your bowl to save weight |
| Water filter | 2-3 oz | Squeeze or pump style; check flow rate before buying |
| Water bottles (2) | 4-6 oz combined | Or a soft reservoir for pack storage |
Bring a small backup water treatment method, like purification tablets, in case your filter clogs or freezes overnight. This has saved more than one trip we've been on when a filter cartridge cracked in cold weather.
Clothing layers for changing weather
Weather on a two-day hike can shift more than you'd expect, even if the forecast looks stable. Pack in layers rather than one heavy jacket: a base layer that wicks moisture, a mid layer for warmth, and a shell for wind and rain. This lets you add or remove pieces as temperature and effort level change through the day.
Avoid cotton for anything worn while hiking. It holds moisture and dries slowly, which becomes a real problem if you get sweaty on a climb and then stop to rest in cool air. Merino wool or synthetic fabrics dry faster and keep working even when damp.
For a one-night trip, one extra set of base layers for sleeping is usually enough. Wearing dry sleep clothes, separate from what you hiked in, makes a noticeable difference in how warm you sleep, even without extra insulation.
- Base layer: moisture-wicking shirt and bottoms, one hiking set and one sleep set
- Mid layer: fleece or lightweight puffy jacket
- Rain shell: waterproof, not just water-resistant, with sealed seams
- Insulated layer: down or synthetic jacket for camp, especially at higher elevation
- Extra socks: one dry pair minimum, wool over cotton
- Hat and gloves: even in summer, mornings above 6,000 feet can dip near freezing
Navigation and safety items
A phone with a downloaded offline map is useful, but it shouldn't be your only navigation tool. Batteries die, screens crack, and cell service disappears in most backcountry areas. Carry a paper map of the route and a compass, and know how to use both before you're relying on them in poor visibility.
A headlamp with fresh batteries is non-negotiable, even if you plan to be at camp well before dark. Trail conditions change, injuries slow people down, and setting up camp in the dark is far easier with two free hands and a working light.
If your route goes through an area with unreliable cell coverage, consider a satellite messenger or personal locator beacon. These devices run $200 to $400 to purchase, plus a subscription for messenger models, but they let you call for help if something goes wrong far from a trailhead. If you're hiking somewhere remote for the first time, it's worth talking to a local outdoor shop or ranger station about current conditions before you commit to a route.
- Map and compass: paper backup even with GPS apps
- Headlamp: plus one spare battery set
- Whistle: three sharp blasts is the standard distress signal
- Satellite messenger or PLB: for remote or low-coverage routes
- Trekking poles: reduce knee strain on descents, especially with a loaded pack
First aid and repair kit basics
A first aid kit for a two-day hike doesn't need to be large, but it should cover blisters, small cuts, and basic pain relief. Pre-made hiking first aid kits often weigh under a pound and cover the essentials, but check that yours includes blister treatment specifically, since that's the most common trail injury by far.
We'd also suggest packing a few items most kits skip: a small tube of antiseptic ointment, a handful of over-the-counter pain relievers, and any personal medications you take regularly. If you or a hiking partner has a known allergy requiring an EpiPen, carry it and make sure others in your group know where it's stored. For anything beyond minor scrapes and blisters, treat first aid supplies as a way to stabilize a situation until you can reach a professional, not a substitute for medical care.
Gear repair items take up almost no space but solve real problems. A few feet of duct tape wrapped around a trekking pole, a small sewing kit, and some strong cord can patch a torn tent, fix a broken pack strap, or splint a cracked pole section long enough to finish the trip.
- First aid kit: blister treatment, gauze, antiseptic, pain relievers
- Personal medications: plus any allergy medication like an EpiPen
- Repair kit: duct tape, cord, multi-tool, tent pole sleeve
- Emergency blanket: lightweight, packs small, useful for warmth or shelter
Food planning for a short trip
For a two-day trip, most hikers plan for three main meals and two to three snacks per day, aiming for roughly 2,500 to 3,500 calories daily depending on trail difficulty and body size. Freeze-dried meals are convenient for dinner since they only need boiling water, but they can run $8 to $12 per pouch, so some hikers mix in cheaper options like instant noodles or couscous with added olive oil for calories.
Breakfast is often the easiest meal to simplify: instant oatmeal packets or granola with powdered milk require no real cooking beyond hot water. Lunch works well as a "grazing" meal eaten while hiking, things like trail mix, jerky, tortillas with peanut butter, or dried fruit that don't require stopping to cook.
Pack about 20% more food than you think you'll eat. Cold weather, harder terrain, and higher elevation all increase appetite and calorie burn, and having a small buffer means you're not rationing on day two if day one took longer than planned.
A quick pre-departure check
Before you leave the trailhead, run through a short mental checklist rather than trusting memory alone. Confirm your tent has all its stakes, your stove ignites, and your filter isn't cracked from freezing in storage. These small failures are common and almost always show up at the worst time, not when you're testing gear at home.
Tell someone who isn't hiking with you where you're going and when you expect to be back. This single step matters more than almost anything else on this list if something goes wrong, since search efforts depend heavily on knowing your intended route and timeline.
Common mistakes
The most common mistake is overpacking clothing "just in case," which adds pounds without adding much comfort. A second common one is skipping a test run of new gear, like a stove or tent, before the trip, only to discover a missing part or a fuel canister that doesn't fit at the trailhead. Underestimating water sources is another frequent issue; always check a current map or recent trip report rather than assuming a stream marked on an old map still runs in dry months.
Next steps
Lay out everything on this list at home first, and weigh your packed bag on a bathroom scale. For most hikers, a two-day pack should land between 25 and 35 pounds depending on body size and gear choices; if you're well over that, look first at your shelter and sleep system, since that's usually where the easiest weight savings live. Then pick a shorter, familiar trail for your first overnight, so you're testing your checklist rather than testing yourself against unfamiliar terrain at the same time.